Instructions to record your iPhone screen
It is simpler than any other time in recent memory to start recording your iPhone and different screens of iOS devices and turn it into a movie. At this point, you do not need to worry about mirroring your gadget on your PC to record what is happening on the screen.
The main thing you will need to do is to stimulate screen recording in your gadget. Screen recording on your iPhone is simple, however, your gadget is not set to record directly from the box.
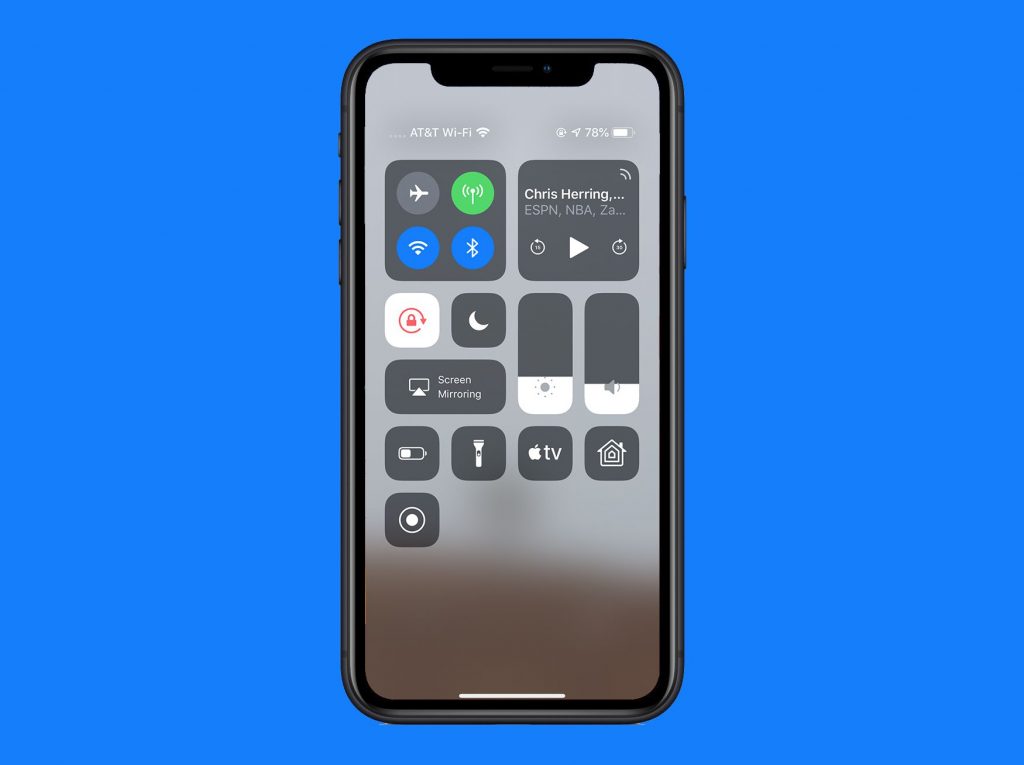
Look down and tap the symbol in addition to near the screen recording.
You should now approach the screen recording in your control center.
Try not to forget about time (and ability)
As colloquially says, “in light of the fact that you can does not mean that you should”. Since your iPhone can basically record unlimited video measurements, this does not imply that this is something you should do.
Apparently, there is no time limit for how much you can record your screen. As far as possible, this is the measurement of the empty space on the hard drive of your iPhone.
You should know, in any case, that your video recording can leave you to chance during extremely long chronicles.
Tidy up the mess
In case the iOS home screen appears on your video, consider modifying your backdrop and creating another page with a single symbol.
To change the backdrop to a default Apple: tap Settings > Wallpaper > Choose a new wallpaper and you will see options for dynamic or still images. Choose a backdrop, at this point Set > Set home screen to turn it into the new backdrop that appears behind the home screen symbols.
Enable do not disturb mode
This will prevent warnings or calls from appearing in the center of your account.
To enable do not disturb (also called “Sleep Mode”): Tap Settings > Do not disturb > Do not disturb at that time, look down and select Silence: Always.
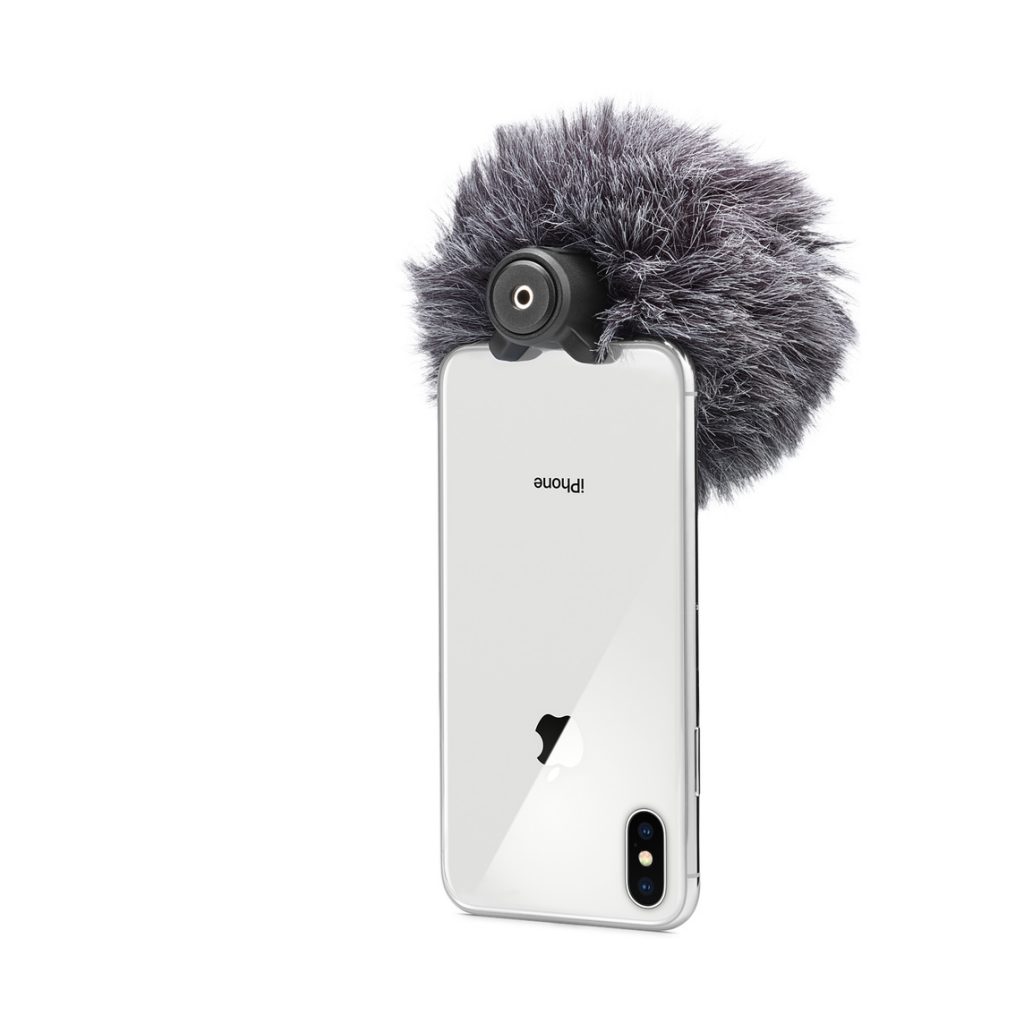
Use a decent microphone
In case you need a competent sound representation, you will need to get an outer mouthpiece that connects to your device.
Or, on the other hand, you may need to consider recording your sound independently after recording your screen.
To improve the sound directly from your phone, I would offer to use headphones with an implicit mouthpiece or buy a flip receiver.
Start recording
Steps
- Go to Settings > Control Center, then tap. next to Screen Recording.
- Open Control Center, tap. , then wait for the three-second countdown.
- To stop recording, open Control Center, tap. or the red status bar at the top of the screen, then tap Stop.

More tips for better recording
Record your voice in a quite place:
Move in a calm climate or if nothing else limits you and the spokesman of the bustle. The best known clamor criminals: heating or cooling ventilation, fan of your PC, closing entrances, canines or alarms.
Start and end trim
When you finish recording your video, you can make slight edits in the Photos app. In both cases, cut the segments towards the beginning and end where you start and stop the account.
For a more developed modification, for example, by adding calls, text or music, you can send your video to a video editorial manager.
These tips should save you time and dissatisfaction when registering your iOS device!
The most effective method to record your iPhone screen.
If you are a visual type of person, then we can recommend this short video for you to watch.
If you need a longer version, then we might recommend this one for you:
Do you want to learn more?
Click on the link below and learn many of our articles to solve every day questions.